
Working with Lightroom pre-sets

| Type of post: | Teaching Resource |
| Sub-type: | Lightroom |
| Posted By: | Hemant Kogekar |
| Status: | Current |
| Date Posted: | Tue, 5 Mar 2019 |
Pre-sets provide a great way of speeding up your work in LightRoom (LR). There are presets available for most functions in LR. There are presets to be used in image import and export, image development, key-wording your images etc. etc. Some presets are bundled with LR and there are many presets available for free and off-course paid.
How to import presets in Lightroom 2018 cc/classic
All the development presets are shown in the left sidebar under Presets. Just hovering your cursor over these shows the effect of these in the small image window at the top of the left sidebar. Click on a preset to apply. Use CMD/Ctrl z to undo if you don’t like the effect. It is that simple.
Presets allow you?to record and organize different combinations of adjustments made in the develop module. One very useful preset that you can create is for initial image adjustments that you would use for most of your images.
For example:
Highlight = -100; Shadows = 50
Remove Chromatic Aberration checked
Noise Reduction – Luminance = 30, Detail=100
Color Noise =30, Detail=100
Now you can use this preset on your images at the start of processing.
Another time saving use is to select this preset while importing images. So that all the imported images will have the same adjustment applied.
Once you get some practice with creating and using presets, there are endless possibilities for new presets. You can create new presets of the filters and brushes, for cropping and toning.
Have fun!
Hemant Kogekar
How to import presets in Lightroom 2018 cc/classic
- Open Adobe Lightroom CC 2018.
- Click on the Develop tab
- Navigate to left sidebar and find "Presets" tab.
- Click the "+" icon.
- Select "Import Preset".
- Navigate to your downloaded preset files and you are done!
Presets in the Development Module
All the development presets are shown in the left sidebar under Presets. Just hovering your cursor over these shows the effect of these in the small image window at the top of the left sidebar. Click on a preset to apply. Use CMD/Ctrl z to undo if you don’t like the effect. It is that simple.
Create your own Development presets
Presets allow you?to record and organize different combinations of adjustments made in the develop module. One very useful preset that you can create is for initial image adjustments that you would use for most of your images.
For example:
Highlight = -100; Shadows = 50
Remove Chromatic Aberration checked
Noise Reduction – Luminance = 30, Detail=100
Color Noise =30, Detail=100
- Open any image and first reset all adjustments.
- Make the desired changes in the Development module.
- Preset ctrl(CMD)+shift+N (or click the + sign on Preset menu and select Create preset
- A new window will open (see image)
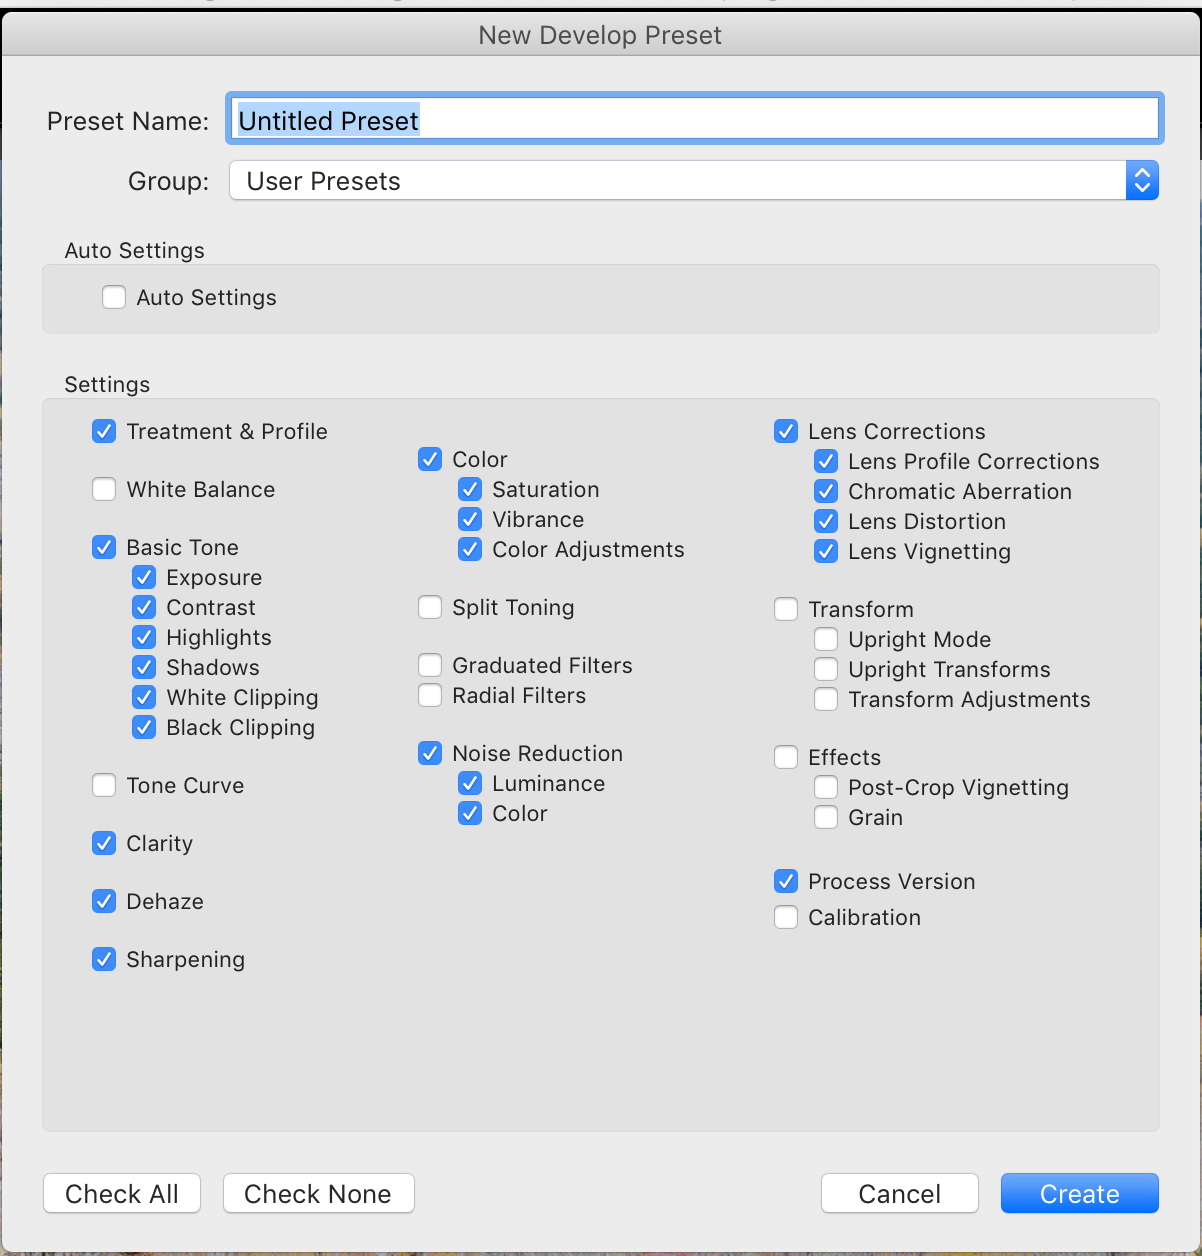
- Give your preset a name say, My Devt preset.
- Click on the box at the bottom “check none”. Then check only the boxes where you have made adjustments (e.g. Highlights, Shadows, Noise Reduction and Lens Correction).
- Click “Create” to save the preset.
Now you can use this preset on your images at the start of processing.
Another time saving use is to select this preset while importing images. So that all the imported images will have the same adjustment applied.
Once you get some practice with creating and using presets, there are endless possibilities for new presets. You can create new presets of the filters and brushes, for cropping and toning.
Have fun!
Hemant Kogekar
