
Mounting Prints

| Type of post: | Teaching Resource |
| Sub-type: | Photoshop |
| Posted By: | Hemant Kogekar |
| Status: | Current |
| Date Posted: | Fri, 13 Aug 2010 |
All prints exhibited in Northside Creative Photography (NCP) Competitions should be mounted. Mounting displays your work to best advantage and it pays to take some care in how you present your images.
SIZE OF MOUNTSFor NCP competitions there is no size limits for colour or monochrome prints and mounts. Nevertheless please do not unnecessarily take up too much room with your mounts as space is limited. If you are entering external competitions always check print and mount size requirements carefully as you may be disqualified if you exceed the stated limits.
METHODS OF MOUNTING
Prints may be mounted in a variety of ways but the most common method is a “window mount”, a frame made from matt board. Other methods include attachment to a backing board by photo corners, double sided tape, “magic dots” etc. Spray on glues will in time discolour your print as will other non speciality glues. Cutting matts takes a bit of practice so when you are starting out you can buy ready cut matts from photographic shops. These come in standard sizes. Some framing shops sell matts of various sizes as they make them from their scrap board. It is handy to keep a few of these ready made matts on hand just in case you are too busy to cut a fresh matt.
MATERIALS
Matt board is available from art supply shops (see a few suggested retailers below). Matt board comes in a wide range of colours but for photography the most common colours are off white, black, grey or charcoal. The reason for this is simple. Strong coloured mounts tend to distract the viewer from your image but really the choice is yours. Matt board comes in large sheets 32in by 40in. To avoid wastage it is best to cut these sheets into four 16in x 20in pieces if you print A3 images or six pieces for A4 prints. This is the outside in method. It leaves plenty of room for you to vary the depth of your mount border. Don’t throw away the centre “window” piece you cut out. It can be used for mounting small prints. If you plan to reuse your mounts there are various forms of temporary attachment of the print to the matt. Magic “lift off” tape is one temporary form of attachment. If you attach the print only along the top side of your print you may need to weight the back of the print with a lift up flap of card or another sheet of matt board to ensure the print sits flat in the matt.
CUTTING MATTS
Cutting matts requires special cutting equipment especially if you want the bevelled edge on the inside of your window. That said the equipment required may be as simple as a ruler and cutter or a more sophisticated rigid cutting frame. It is a good idea to shop around and see what is available to meet your needs. See list of suppliers below. The matt itself can be cut with a “v” outline pattern etc and specialist tools are available to decorate your mount. NCP has two matt cutters that you may borrow and instruction can be given if you are unfamiliar with the equipment. Ask a committee member for the name of the current equipment manager.
STYLE OF MOUNTS
The style of a mount can be varied according to the print you want to display.
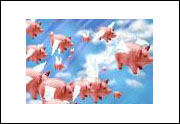 Rectangular image Centered[/caption] |
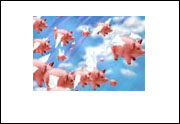 Rectangular image Bottom Weighted[/caption] |
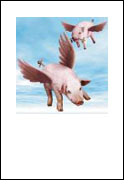 Square image Bottom Weighted[/caption] |
Images can also be set at angles or in ovals or circles but remember the style of border should complement your print. Some photographers make a fine border as part of a print often picking up a tone from the print itself. Others “key line” the image to give the image a fine black outline and leave a small amount of white paper around the image inside the mount.
Images submitted for NCP competitions must not be framed. However, some external competitions do require your prints are framed. Then again you may wish to frame some of your special images. Plain wooden, black or silver metal frames work best with photography. Framing protects the image from dust and scratching. But remember to use acid free backing material and keep your image out of strong light. Inkjet prints will fade. Commercial prints probably have a longer life but they too will fade.
STORAGE
One of the best ways to protect your prints from light is to place them in an acid free album- see suppliers list. Prints also can be stored in special acid free plastic pockets or in acid free archival boxes available from photographic specialists or document storage specialists.
LOOK AND LEARN
One of the best ways to learn how to mount prints is by observation. When you review entries in a competition or view exhibitions always make a point of noticing the way the image is mounted or framed.
SUPPLIERS
This list is not comprehensive and it pays to shop around. Show your membership card and many suppliers will provide a discount.
MATT BOARDS, CUTTERS
| Eckersleys, 21 Atchison Street, St Leonards 9439 4944 (also in Parramatta and the City) |
| Art Scene, West Ryde https://www.artscene.com.au/ |
| Sydney Art and Framing Supplies, 5/49 Derby St, Silverwater, 02 9648 1118 http://www.artandframing.com.au/ |
CUTTING FRAMES
| FrameCo, 03 9843 1900 This web site also has on-line free tutorials for matt cutting. |
ACID FREE ALBUMS
| The Photo Album Shop, Unit 15, 12-14 Beaumont Road, Mt Kuring-gai, (02) 9457 7322 - 10% discount for members (if ordering online use promotional code NCP29 in checkout) |
